Thursday, November 3, 2011

Saturday, October 1, 2011
Join Stampin' UP! October 1- November 11, 2011

No problem, then choose $100 in FREE Stampin' Up! Product instead.
Here's an offer to DIE for!If you've been looking for an opportunity to do what you love, while getting a 20 discount on your favorite products, now is the perfect time! During October 2011, you'll get a FREE Big Shot when you join the Stampin' Up! family as a demonstrator.*
Use the Big Shot die-cutting machine and Stampin' Up!'s exclusive dies** to create uniquely beautiful projects in a flash.
In addition, the new-demonstrator Starter Kit--a steal at just $175--contains over $345 worth of stamp sets, card stock, ink, accessories, and business supplies-everything you need to start your new business.
There are so many benefits of being a Stampin' Up! demonstrator, including
- A 20 percent product discount!
- A free monthly issue of Stampin' Up!'s demonstrator-only magazine, Stampin' Success!
- Sneak peeks at brand-new products!
- Invitations to exclusive Stampin' Up! events!
- Free access to an online community of 30,000+ crafters/stampers and creative artists, as well as 160,000+ project samples!
- Plus, access to an exclusive video and training for your new Big Shot!
Don't miss this BIG deal! Contact me today to learn how you can take advantage of this great opportunity and get your FREE Big Shot!
*Or up to $100 in FREE Stampin' Up! products
**Big Shot dies sold separately
What are you waiting for? This is the time to join.
Monday, August 1, 2011
Happy Birthday MoM

Here are the cards that went into a box set, I made my Mom for her birthday.
I used my Big Shot and Spellbinders I found on clearance.
they are fairly easy to use in the big shot and I loved the different sizes of the dies.
The one downfall is that they are metal so they do move around if you are trying to emboss or make a frame.
I also used my texturz plates and my all-time favorite owl punch and decorative label punch,
I think it coincides with my spellbinders nicely.
Here are a couple more pics up close.

I Just Love this Owl !

This is a gift card holder all the cards are almost 4x4
Here is a Birthday Easel Card

and here are two other cards and the box.


Let me know what you think,
Kymberli
Sunday, July 31, 2011
Side Step Card

Hello All,
Here is a card, I made for my DH it's not the greatest pic but I hope you get the idea.
My computer and camera are acting up so,I haven't been posting.
I think all the bugs are worked out or at least praying that they are.
Why is it that you upgrade one thing and then everything else you own then becomes incompatible & UN-discoverable? I was so upset spending the day fixing my laptop,when I could have been stamping...
Thanks for letting me vent.
Let me know what you think,
Kymberli
Wednesday, July 20, 2011
SU! Friendly Words

So every time I have seen SU! whisper white paper embossed,
I think it is so "Regal" so I came up with this card.
I used SU! Rich Razzleberry card stock & 1/4" grosgrain ribbon.
I used my "BIG SHOT" & a texturz plate to emboss the front of the card.
I then used Friendly Words Jumbo Wheel with SU! Stampin Around Wheel Guide
I really love using SU! wheels and the wheel guide helps me keep everything straight and in order.
I love that you can connect the two pieces so that you can essentially stamp up to a 22 inch border or
snap them together to make a right angle corner.
I love that you can connect the two pieces so that you can essentially stamp up to a 22 inch border or
snap them together to make a right angle corner.
I rolled my sentiment on a 4" x 4 1/4" piece of whisper white paper then used my SU! Stampin' Sponges to add basic gray ink to give it a distressed look.
These sponges are a great deal because they last forever.
I have had my sponges since, the first time I signed up with SU! in 2005.
These sponges are a great deal because they last forever.
I have had my sponges since, the first time I signed up with SU! in 2005.
You get 3 sponges but you just cut them into little wedges
depending on your preference you can get 6-8 wedges from one sponge.
depending on your preference you can get 6-8 wedges from one sponge.
Then I sewed around all the edges and placed the butterflies on each section and
added a little rhinestone for some "bling".
I made the butterflies with my SU! Beautiful Wings Embosslits Die.
Let me know what you think...
Kymberli
added a little rhinestone for some "bling".
I made the butterflies with my SU! Beautiful Wings Embosslits Die.
Let me know what you think...
Kymberli
Tuesday, July 19, 2011
Cars 2
So as many of you know Cars 2 came out at the end of June and Little "J" loves CARS!!!
So on my 2 week hiatus, I saw a pattern for a crocheted car and I thought,
I could make a red one and Little "J" will think it's Lighting McQueen.
So as I started my project the car was looking like a boat so,
I winged it without a pattern and this is what I came up with...

I may try again because if Little "J" had not taken it from me I would have done some reworking,
But all and all not bad for my first try ?
Let me know what you think,
Kymberli
Where has the time gone?
I can't believe it has been two weeks tomorrow since my last post...
Well I have found myself a bit uninspired lately and between potty-training and life in general,
I took a little break.
So I did keep busy, I was just being LAZY when it came to taking pics and writing. I really need to change that because, I really did start to "Miss my Blog Family".
I did come up with this tri-fold card, I had to walk away from it because,I didn't like were it was going,but in the end,I think it came out okay. I used some paper scraps and an old SU! Simply Scrappin' Kit and was glad to put it to use.


Wednesday, July 6, 2011
Sew Simple
I hope you all had a FUN & SAFE Holiday and were able to share some downtime with Family & Friends.
We had a nice holiday weekend and Little "J" had a blast in the pool.
We had Root Beer floats while we watched the firework show Master "D" put on and all in all had a great time.
We are trying to stay cool from the triple digit heat,but honestly it just rained a few weeks ago so we can't really complain about the heat to much.
So last week, I tried to organize some of my paper stacks. After I searched high and low for the "perfect" graduation paper and finding it in my very own stash made me realize, I really need to figure out what I have.
So I have decided to try and CREATE with one stack at a time and hopefully my paper stacks will be put to good use and I will have room for more crafting supplies....
So here is my first Project

All the paper came from my paper stack except for Very Vanilla & Crushed Curry (retired SU! card stock)
I used on the side. I made two cards the fronts are the same and the insides are just a bit different.
I stamped the image three times
once on the Very Vanilla and once on green paper and once on Crushed Curry.
I then cut out their dresses and attached them with snail.

I added paper buttons with my SU! sizzlits die.
I really enjoyed sewing the paper together for the inside of these cards,
for the stitching, I used my New Singer "Stitch Sew Quick"
I found it at Wal-mart for around $14.00 dollars and It's so fun to use.
.
Let me know what you think...
Happy Stamping,
Kymberli
Friday, July 1, 2011
2011-2012 SU! Idea Book & Catalog is here!
2011-2012 Stampin' Up! Idea Book & Catalog
(July 1, 2011-June 30, 2012)
Here it is in all it's glory

I hope you enjoy it.
Online ordering begins at Noon.
(Mountain Time)
Yeah the New Catalog !!
It seemed like FOREVER, I am so excited about this "NEW" Catalog...
If you are still dying to get your hands on one contact me.
I will be posting a link to the PDF file as soon as it goes live.
Until Then I hope you Have a Safe & Fun Filled Weekend.
and let me know what you think of my Customer's Catalog Survival Box/Kit

Thursday, June 30, 2011
DOstamping Stars Thursday Challenge #55
When I saw the challenge this week, I knew exactly what card, I wanted to make.
I actually made something similar for my son's 10th birthday party invite.
The only real difference was his invite was a bit larger.
So here is what I came up with

Tuesday, June 28, 2011
Hoot Hoot to You!!
Today's inspiration came from my June 2011 Stampin' Success Magazine.
It's a magazine SU! Demonstrators receive to
INSPIRE us to CREATE so we can SHARE with others.
A fellow demonstrator Doris Denman's card just wowed me.
So I decided to take the plunge and try it out for myself.
So here is my take of a tri-fold shutter card.
I started with SU! Chocolate Chip as my base card stock
and added DSP from a Paper Pack,
I had in my closet that I never used.
and decided this was the perfect opportunity.
Instead of covering all the sections with DSP,
I choose to use Punches and Stamps
I think it adds a lot of dimension and is a fun way
to showcase a lot of different ways to decorate a card all in one place.
Tri-Fold Shutter Card's


Tri-Fold Shutter Card Tutorial

Here is my Tutorial for a Tri-fold shutter card,
I actually got the idea from my June 2011 Stampin' Success Magazine.
It's a magazine SU! Demonstrators receive to inspire us to create so we can share with others.
A fellow demonstrator Doris Denman's card just wowed me.
I had never seen one of these cards and after, I googled it, Boy did I feel like I was in the dark and oh the possibilities it is such a versatile card that can be used for any occasion.
I hope this tutorial is helpful and inspires you to create something fabulous.
So without further ado...
Sunday, June 26, 2011
Buckle Card Tutorial
I was asked for a tutorial on the buckle card,
I posted a few days ago so, I thought what the heck,
I did not create this card from scratch, I got the idea from SCS about 4 years ago.
Here is my version and I hope you can understand it
and I hope it inspires you to create one of your own.
First you need 3 pieces of paper of coordinating colors
Card Base 5 1/2 in. x 8 1/2 in
Belt 1 5/8 in. x 4 in.
Inside Card Piece 4 in. x 5 1/4 in.
& SU! Word Window Punch (119857)

Friday, June 24, 2011
Designer Series Paper ... Well Almost Tutorial

So for those of you that are following me and my crafting antics,
You know I am trying to use what I have before going out and buying more.
I thought, I would show you a fun way to make your own Designer Series Paper (DSP)
I did not come up with this and have been using this idea for over 5 years. and for some of you,
you will see it and think been there done that but sometimes it's fun to bring back something old.
Happy Birthday Rafi

This is a card holder, I made for a dear family friend, I used SU! Basic Black card stock and found the tutorial on SCS here is a link to the Stationary Box Directions.
I didn't add the address book,stamp pocket or pen.
Here are a couple more pics of the box.

I made 4 full size cards,
3 3x3 cards and envelope's and 4 tags.


I did emboss the paper with the big shot before making mini envelopes and I stamped a small sentiment on the back of the tags that could be used for any kind of gift.
Let me Know what you think.
Paper FlowerTutorial Update
I have had such a wonderful response from my first tutorial and I am so happy that there are people out there that are enjoying it and I hope it is inspiring you to create some wonderful projects.
I just wanted to add a picture so you could see the difference between SU! card stock and regular
scrapbook paper.

Thursday, June 23, 2011
It's Time to Say Goodbye

That's right the time has come to say goodbye to a cherished few...
& HELLO to a New and Exciting Catalog...
Can you tell I can't wait.
Here are a few links to get you updated:
Last Chance: Print Retired Stamp List PDF
Online Store Link to: Wood Mount Stamps
Online Store Link to: Clear Mount Stamps
Last Chance: Print Retiring Accessories List PDF
Online Store Link to: Wood Mount Stamps
Online Store Link to: Clear Mount Stamps
Last Chance: Print Retiring Accessories List PDF

Just an F.Y.I. Many of these items go fast
So Happy Shopping...
Have a Great Day and Thanks for Stopping By
Kymberli
DOstamping Stars Thursday Challenge #54

So for this week's challenge when,I saw these colors all that came to mind was the
Fabulous Florets Stamp Set it is so versatile.
I love that it has a coordinating embossing folder
for the "Big Shot"and the "DSP" .
I started off with Tangerine Tango as my Base Card and I Stamped on Whisper White alternating the flowers to make my Custom "DSP" so the colors could match this weeks challenge.
I embossed the buckle with the coordinating Flower garden Embossing Folder.
I then stamped two more images of the flowers and used sponge daubers to add some color, I cut them out and used Stampin' Dimensionals to "pop" them out and I think it adds another dimension to the card.
Every time, I see this set it just makes me smile.
I hope you like my Buckle Card this week.


Materials Used:
SU! Stamp Set: Fabulous Florets
SU! Paper: Daffodil Delight,Melon Mambo,
Tangerine Tango and Whisper White
SU! Punch: Scallop Edge Border Punch, Word Window Punch
SU! Ribbon:Pumpkin Pie
Accessories: Big Shot, Snail,Sponge Daubers,
Let me Know what you think
Happy Stamping,
Kymberli
Friday, June 17, 2011
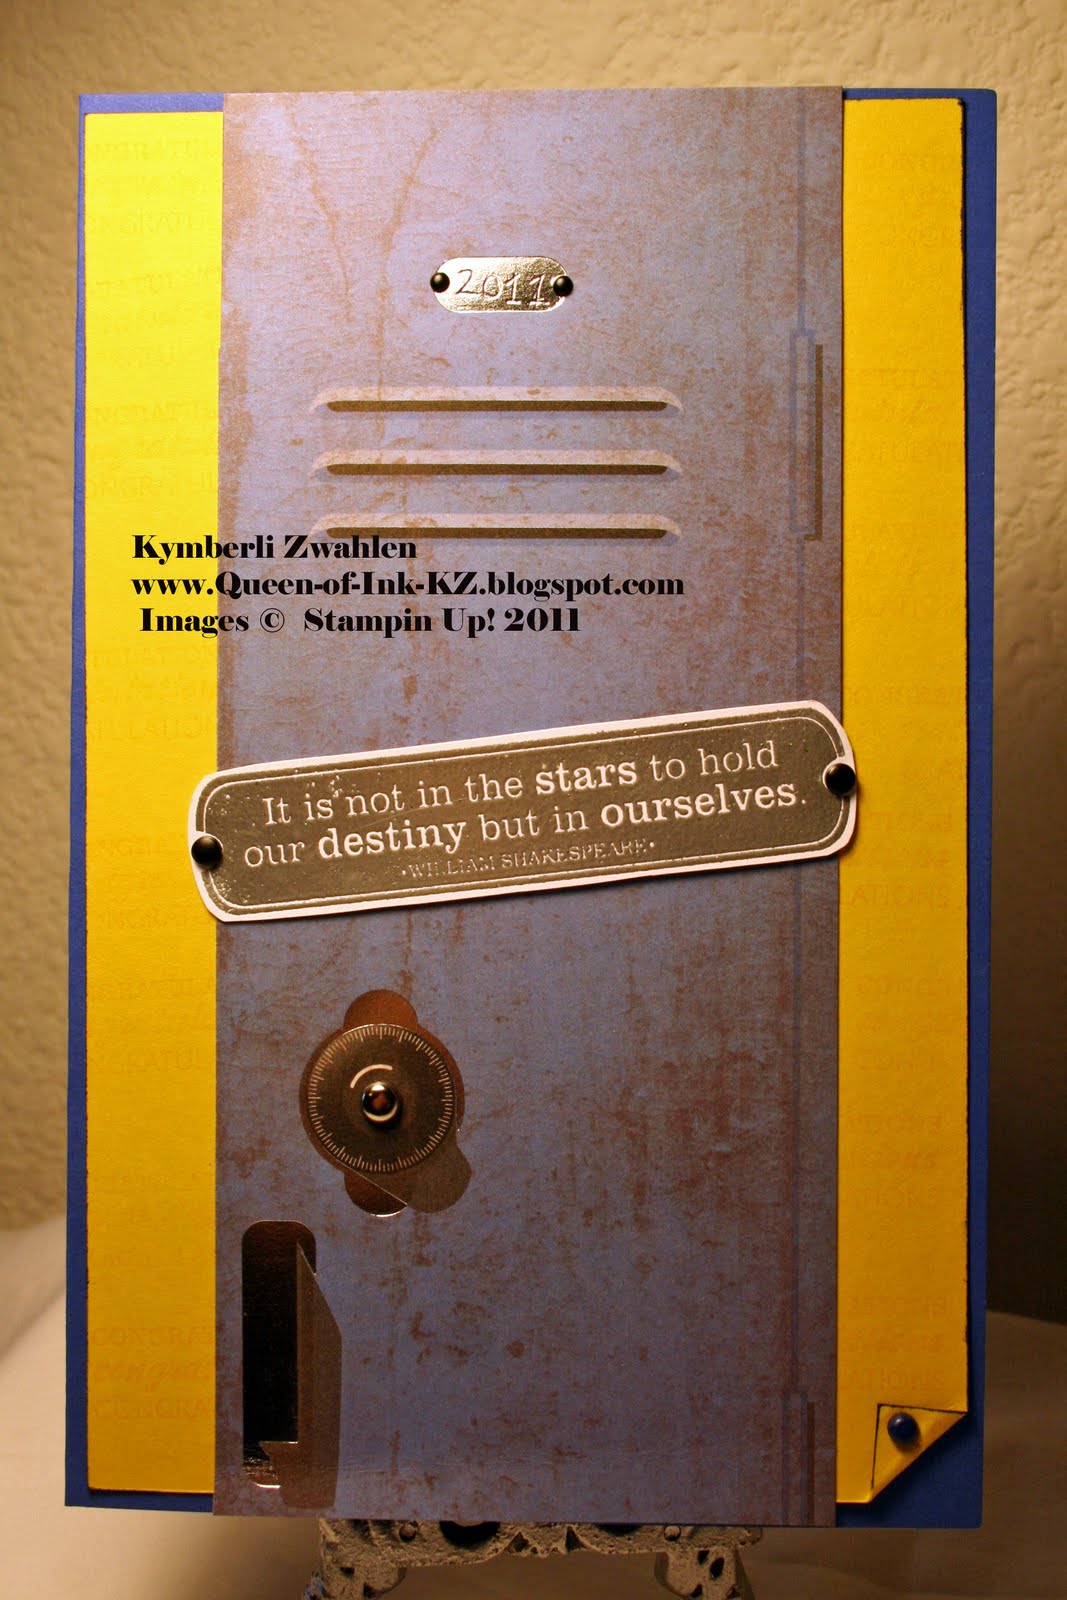
Graduation Cards
Well all the celebrating has come to an end and I wanted to take time and share a few of the things,
I made this year.

I also made these cards:

 |


They were great to hold checks or money. I cased the card concept from my up-line Dawn Olfchefske.
Here are a couple of pictures of the cute toothpick holders,I made.


These toothpicks seemed easy enough because we only had 35 cupcakes...
That's when I realized,I need the Front & Back to be decorated. and each side had 2-3 punched out images. Oh was I glad that was over...lol
They sure looked great and the guests loved them.


That's when I realized,I need the Front & Back to be decorated. and each side had 2-3 punched out images. Oh was I glad that was over...lol
They sure looked great and the guests loved them.


Let me know what you think
Subscribe to:
Posts (Atom)